Introduction
In this guide we'll take a brief journey through the basics of creating a stepfile in ArrowVortex. The example music used in this guide is "Time Lapse" by TheFatRat, but feel free to use your own music instead. If you want to make use of the example music then you can download the following bundle, which contains the music file as well as some banner/background artwork.
Before we start, here is a quick overview of the most important controls used to navigate ArrowVortex. This is by no means a complete list, but it should be enough to get you going for the duration of this guide.
| Action | Keys |
|---|---|
| Play/pause | Space |
| Change snap | Left/Right |
| Move cursor | Up/Down |
| Zoom in/out | Numpad +/- |
| Switch chart | F5/F6 |
| Place notes | 1,2,3,4,(...) |
For a more extensive list of controls, you can view the shortcuts inside the editor by using:
Creating a stepfile
First, let's open the music file in ArrowVortex. The easiest way to open a file in ArrowVortex is by dragging a music file, stepfile or song folder onto the editor window, but you can also do it the old fasioned way:
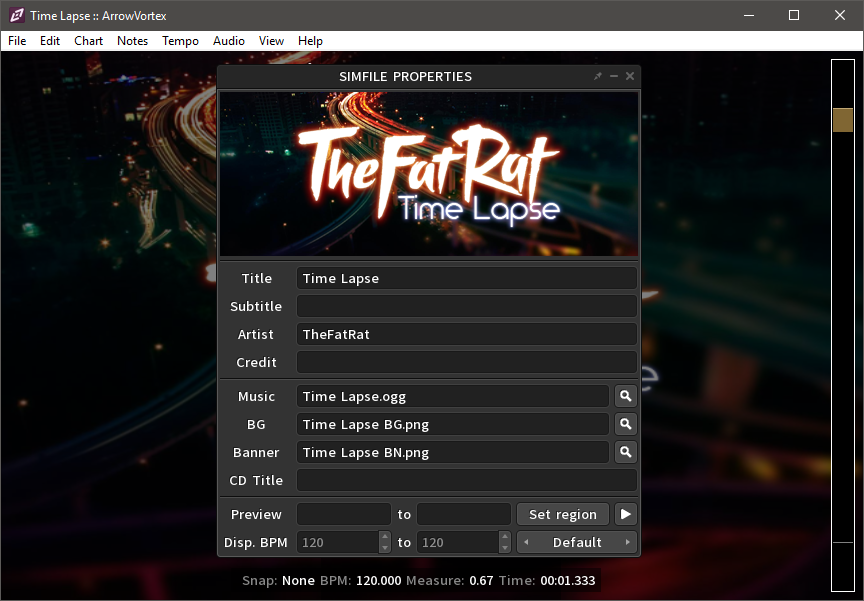
When you open a music file in ArrowVortex, it will scan the other files in the song folder for filenames that contain certain keywords (banner, bn, background, bg) and adds them as artwork. It will also try to extract the song title and artist from the music file. You can edit these properties (and others) in the Simfile Properties dialog:
If you are using the example music, your simfile properties should look something like this:
You can edit these properties any time you want. If you rename or add files, you can also use the search buttons (magnifying glass) to scan the song folder and update the filenames automatically. For now, let's close the simfile properties dialog and continue with the next step: syncing the music.
Syncing
The next step on the list is syncing. In this step we'll figure out the two values necessary to define the tempo of our music: the BPM and offset. Here's a brief description of both:
- BPM: beats-per-minute, determines how much time passes between two beats.
- offset: music offset in seconds, determines when the first beat occurs.
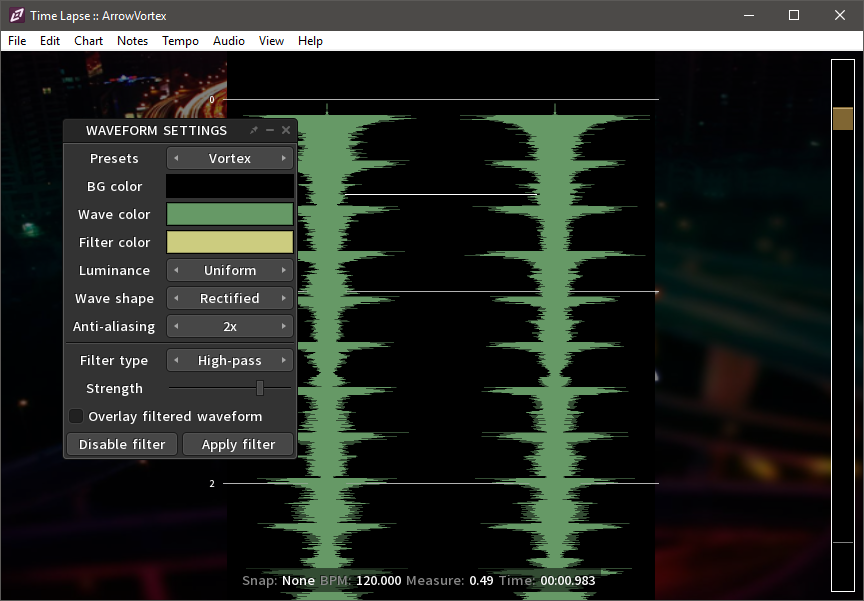
In time based view you are able to inspect the waveform of the music. If you want to, you can change the appearance of the waveform by using the waveform dialog:
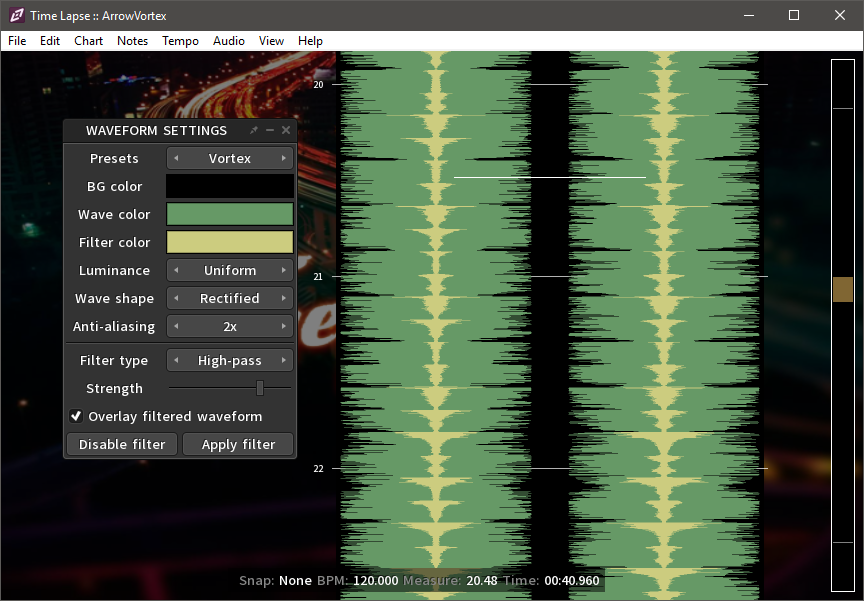
After switching to time based view and opening the waveform dialog, your editor should look something like the first screenshot below. As you can see, the beat lines do not quite line up with the peaks in the waveform, even though they're pretty close. Sometimes it's useful to adjust the appearance of the waveform or to apply a filter in order to make the peaks more visible. After using Apply filter, your waveform should look similar to the one in the second screenshot (if not, make sure the overlay filtered waveform checkbox is checked). Once you're done tweaking the waveform appearance, you can go ahead and close the waveform dialog.
Besides inspecting the waveform and beat lines, you can also listen if the beat sounds right. This can be done by enabling the beat tick:
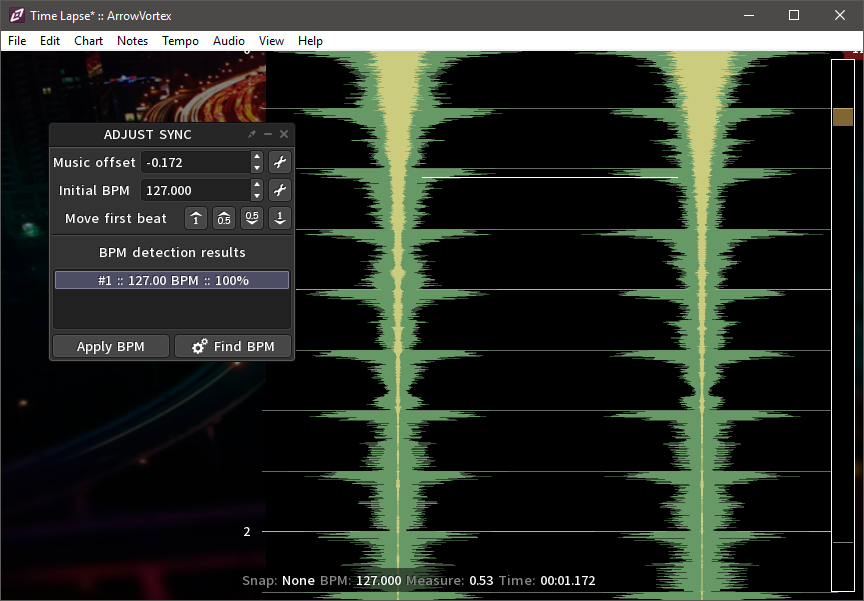
If you enable the beat tick and listen to a few seconds of audio (press space to play/pause), you'll notice that the beat sounds off as well. Since the current tempo values are evidently wrong, let's correct them. The easiest way to do this: just let ArrowVortex figure them out automatically. Start by opening the Adjust Sync dialog:
After pressing the find BPM button in the adjust sync window, ArrowVortex will try to detect the correct BPM and offset by analyzing the music. The detection returns one or more possible results. As it turns out, the beat in the example music is easy to detect, so only a single result is returned. You can now select one of the results and press apply BPM to check if the result is correct. When the new values are applied, your waveform should look something like this:
In this case the BPM detection did a good job, the detected BPM and offset are both correct. If the beats still look or sound incorrect, you might have to fiddle around with the values in the adjust sync dialog to get things right. The most common error is an offset that is off by half a beat, which you can easily fix by using the move first beat buttons to increase or decrease the offset by 0.5 beats.
Syncing is now done, so feel free to disable the beat tick, close the adjust sync dialog, and switch back to row based view. You can keep using time based view as well if you prefer to keep the waveform around. Either way, let's move on to the next step: adding charts.
Adding Charts
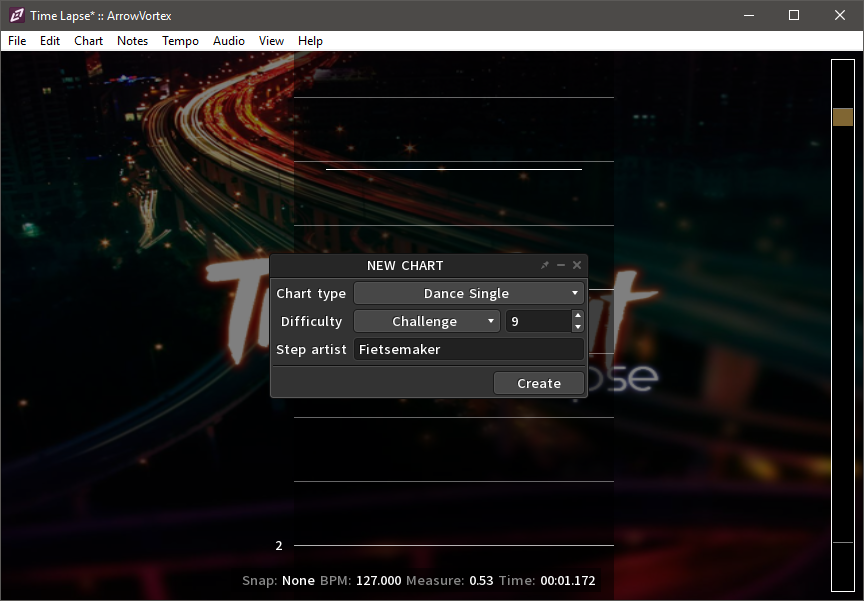
The next step is to add a chart to the stepfile. For this example we'll stick with Dance Single, which is the 4-panel mode played in DDR/ITG. To add a chart to the stepfile, you can open the new chart dialog using:
The new chart dialog has several properties that you can fill in, such as difficulty and step artist. You don't have to fill these in right now, you can always edit them later. The only property that can't be changed once the chart is created is the chart type. At the end, press create and ArrowVortex will open the new chart directly.
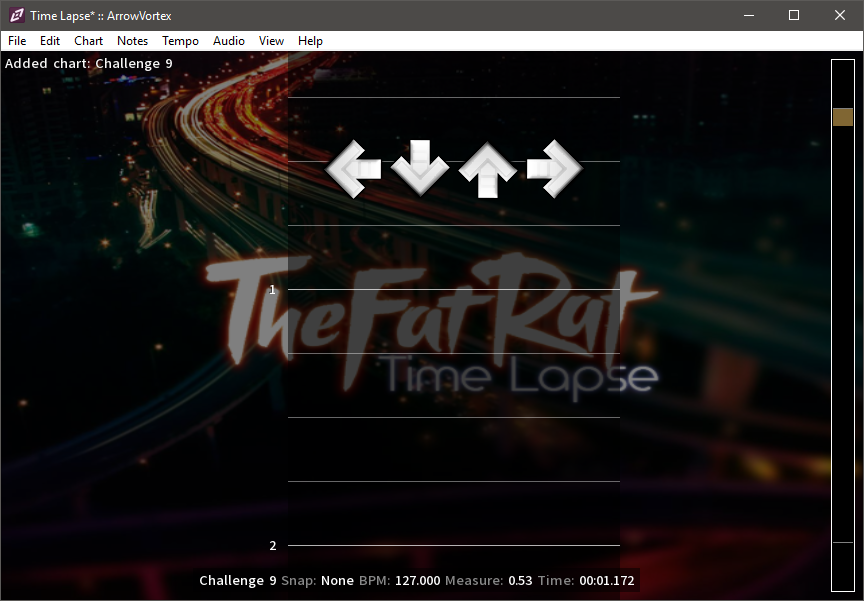
You'll notice that the cursor has changed from a line to a row of arrows. This indicates a chart is open and notes can be placed. You can switch back to sync mode (or to other charts) by using F5/F6. Let's move on to the final step, adding notes.
Adding Notes
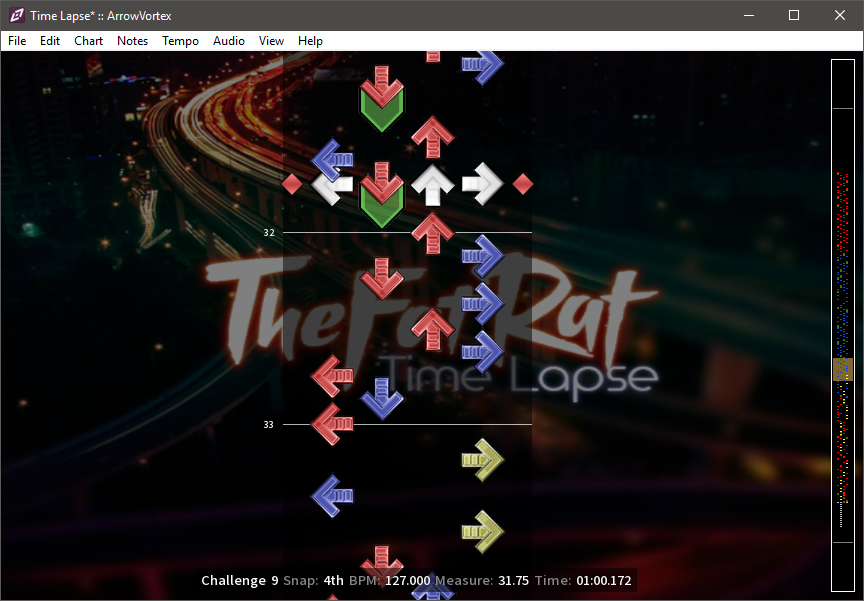
Before adding notes, let's talk about snap. Snap is important, because it determines how the cursor moves when you press the up/down keys. You can change to a different snap by pressing the left/right keys. The current snap is diplayed in the statusbar at the bottom of the editor window, and is also indicated by two colored diamonds at both ends of the cursor. Using the right snap to move the cursor arround allows you to place notes at specific beat or sub-beat positions.
With snap and cursor movement sorted out, adding a note is as simple as pressing the number key of the column you want to place your note in. The example chart has 4 columns, so the 1-4 keys are all you need. Once you've place some notes, you can select them by left clicking and dragging a selection box. Here are a few basic controls to get the hang of note placement:
| Action | Instructions |
|---|---|
| Place note | Press the number key. |
| Place mine | Press the number key while holding shift. |
| Place hold | Hold down the number key and move the cursor. |
| Place roll | Select a hold and press the tilde key (~). |
| Remove note | Select a note and press delete. Or: press the number key when the cursor is on a note. |
There many additional editing functions available in the Notes menu, and you can also perform familiar editing operations on notes you've selected, such as undo, redo, cut, copy, and paste. When you're done placing notes, your chart might look something like this:
Then again, it could also be completely different, that's entirely up to you. Finally, you can save using:
The default save format of ArrowVortex when you've opened a music file is Stepmania/ITG (.sm), so if you want to save to another format such as Stepmania 5 (.ssc) or Osu!mania (.osu) you will have to use Save as... instead.
Conclusion
This pretty much wraps up the basic guide for creating stepfiles in ArrowVortex. Obviously there's tons of other features in ArrowVortex to explore, but the material covered in this guide should be enough to get you going. If you have any questions you can head over to the DDRNL forum and drop a message in the ArrowVortex thread.
